Monday, June 27, 2011

Make This: Nature Explorer Bag

This is the little nature explorer bag I designed and made for all the kiddies who joined us at Tettegouche Camp last week.  Yes, I made 5 of these in less than a week, then stocked them all with a bunch nature explorer goodies to keep the kiddos busy.  And it worked.
The bags actually were a big, big hit and the kids carried them around all weekend and did things like captured worms and a sluggish wasp in the bug jars, sketched wildflowers in their field notebooks, gathered treasured rocks in their tins, chased each other in the dark with their flashlights, and blew their whistles CONSTANTLY (yes, think twice about including a whistle that can be worn around the neck and carried with you at all times--especially if you are trying to have a peaceful, bucolic wildife experience.) 
You can see I made them each in differently colored cotton-linen blend fabrics, then lined them each in constrasting homespun plaids.  Don't let all those sweet smiling faces fool you--they were all evil whistle-blowing wraiths.  Also snack-demanding beasts who moved in packs.  And don't even ask about the platypus game and the dangerous hijinks that involved....but at least the differently colored bags kept the spats about whose bag belonged to whom at bay.
I designed the bag with several handy pockets, inside and out.  The inside pockets were sized to hold little notebooks, a magnifying glass, a small set of colored pencils or crayons and other handy nature stuff. 
I made the flap pockets on the front with accordion folds so they could expand to hold their bug canisters when they have some precious cargo to tote around and didn't want to jostle their insect friends around in the bag with all the other junk.  I also designed the bag to have that easy fold-over top so the kids would not have to fuss with opening and closing the bag and could have quick access to their bag contents--I think I maybe love this aspect of the bag more than anything--so laissez-faire, so unstructured in the best way.  Maybe this is why I want to make one for myself--only with a wider, adjustable strap--and why a couple of other big people asked me to make one for them too.  I may have to open my own nature explorer bag making sweat shop.
If you like the design as much as me and the kiddies, you can make your own too because I have a nice little downloadable tutorial for you.  Right here:

Now, I have to warn you that making those accordion fold pockets can be a little confusing--I did put some detailed photos out in a Flickr set, here, and there is also a photo mosaic of all of the steps right here.  While I love the accordion fold pockets and after making 6 of the bags now, could probably make them blindfolded with a full cosmopolitan in one hand, you should know there is always the option of just making flat, patch pockets and I will not think any less of you for it.

The tutorial, of course, has the usual detailed instructions with illustrations, but it also has links to all the places I bought my nature explorer supplies you see in the photo above, as well as copies of the labels I made to put on the tins and little notebooks if you want to customize some of your own.

Did I mention this is one of my all-time favorite designs and tutorials I have made?  It is.  I like it.  I hope you will too.

Tuesday, June 21, 2011

Tettegouche Camp with Friends

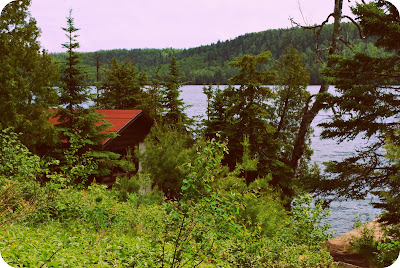
{View of Lake MicMac from Camp}
{Cabin A and the Water Pump}
{Wild Columbine}
{Tandem Jump into the Lake}
{Dininghall Porch}
{Lady Slipper Orchid in Bloom}
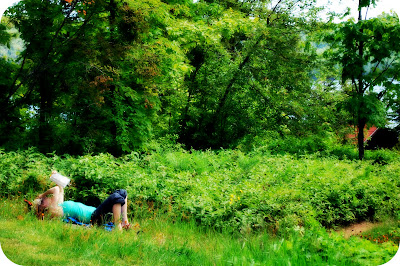
{Reading in the Grass}
{Old Boathouse on Lake MicMac}
{Uncle A-Bomb on the Dock}
{Miss Bean's Fancy Toes}
(Patch of Hawkweed}
{Beeper peering into the creek on a hike}
{Woodland Flowers}
{Ruins of a Root Cellar in Camp}
{Tettegouche Camp with Friends}
We have been away at Tettegouche Camp again for a few days.  Still one of the loveliest places I have ever been, and even more lovely when your closest friends rent the other three cabins in camp. You can see more photos here or, read about trip last year here.    
And for those of you who could give a rip about my vacation photos, I will be back later this week with a little tutorial on how to make a nature explorer bag for the kiddies--or with a few modifications, a summer bag for you, so stay cool.

Saturday, June 11, 2011

Lego Zip Pouches--Make Your Own If You Want To

 I actually went sort of simple for Beeper's birthday party this year--just a little party outdoors at a favorite local playground with lots of friends and some balloons and cupcakes.  Since it was still supposed to be a Lego themed party, I made these little zip pouches printed with multi-colored stacks of Legos as favors--I figured the kids could re-use them as pencil pouches, or just to hold a few Legos for building on-the-go.  I stocked each pouch with a tiny set of markers I found in the $1 section at Target, a small half-moon envelope I made and filled with a few Lego-themed coloring cards, and one of the Lego mini-figures (dang, the kids love those figures).  
 Of course, there were some games.  I bought a couple of large plastic bags of Legos secondhand at the thrift store and put them in a large jar for use at the party--then I dumped them out on a picnic table and had the kids work in teams to build as tall of a lego tower as they could in 2 minutes.  In order to win, the tower not only had to be the tallest but it also had to be able to stand on its own--extra mini-figures went to the highly-envied winners.
I also had them build their own lego creations and present their creations individually to the group, describing what they had built and demonstrating any special functionality.  This game was fantastic because they were each so proud of their creations--we gave out glassine bags of those lego-like candies you see in the first photo as prizes for each of them.  
Other than that it was a lot of running around willy-nilly at the playground, eating loads of watermelon, playing with caterpillars that were falling from the trees, and spitting sunflower seeds at one another--or what I think may be the perfect party for a 7 year old.
As for you, well, if you are interested in making any of the above, here's what I've got for you:

1) Lego Zip Pouches--I have put the image of the lego stack I printed on the fabric out in my Flickr account if you would like to use it in whatever creative way you desire--you can find it here.  There are also several Lego mini-figure images out there if you would prefer to use those too.  I made the pouches using the same downloadable tutorial instructions I made a while back for the art supply pouches--you can find it here.  These particular pouches were all made using a single 8.5x11-inch piece of fabric that I printed with the lego design (more about printing on fabric here too), and lined it was a nice bright lego-ish solid color that matched the zipper.  Each pouch probably only took me about 30 minutes to make.  I also uploaded a copy of the exact design I printed on the fabric, with the lego image placed for printing on a 8.5x11 piece of fabric which you can then turn into a zip pouch.  You can download that here: DOWNLOAD LEGO POUCH.  Both designs you see above are in there. 

2) The Half-Moon Envelopes with the Coloring Cards--I put a template out for you to download in case you want to make some of those: DOWNLOAD HALF MOON ENVELOPE TEMPLATE.  The coloring cards were all made from stuff I downloaded from the Lego website or from this website and this website--I just resized them so they fit 4 to a page.  I also put the Lego-Man graphic--found here--on the front of the envelope, which you can customize with your own headline before you download it for printing.  Incidently, I buy all my paper from Paper Source, if that is of interest to you--they make lots of nice bright sturdy papers that are good for printing.

3) The Invitation: while I never did post a photo of the actual completed invitation, I did share the photo I used for the invitation with you--see it here.  For those I just printed the photo out and attached it to a bright yellow post card with red photo corners and sent it out in blue envelopes (again, Paper Source).  But if you want to use the photo I made for the invite, please feel to use that as well--you can also find that in my Flickr account, right here.

So, there you go.  Go forth and build you own Lego birthday party, if you want to.  Or maybe just make one of the Lego-emblazoned pouches for a little someone special who has a soft spot for Legos.  Whatever, do what you will--I'm just the hired help here.

Thursday, June 9, 2011

I Did It!

Woohoo!  It's done!  I did it!  I really, truly made a quilt!  High-fives all around, please.  

Okay, but yeah, it's not perfect--I had a little problem finishing the binding in that nice seamless looking way it is supposed to be finished so I just gave up and sewed it together in whatever half-assed way I could manage.  Also, yes, I took the easy route because I tied the quilt top rather than quilted it--but c'mon, it's a picnic quilt, which I thing lends itself to hand-tying and that low-tech, old fashioned sorta look--right?  And really, I was not entirely happy with the combo of fabrics once I laid them all out--too much pattern competing for your eye and also the off-white calico I used with the little purple violets--well, it just did not work for me.  I felt like my grandma came along and inserted her own nightgown in there. 

But aside from ALL THAT, yeah, I am good with it.  It came together pretty easily, and I really, really liked the process of hand-sewing on the binding--mostly because I like to hand sew, but also because the binding just makes a quilt come together, like putting a painting in the right frame.  And most of all, when I gave it to Rae, well, she was just very touched and I really felt like making the quilt communicated the gratitude to her I feel--which is what it was all about anyway. Well, that and banishing my never-made-a-quilt-before-anxiety.  

Next up?  My own picnic quilt.  Except this time I think I will make a Denyse Schmidt quilt design because she already has that whole solid fabric to print fabric ratio figured out and her designs are just so damn beautiful they make my stomach hurt.  And who does not want to have a picnic quilt that makes their stomach hurt?

Tuesday, June 7, 2011

Birthday Counting Cards

I have been making these Birthday Counting  Cards for Beeper for his last 3 birthdays and he still loves them.  In fact, I was informed by another parent that while Beeper was at another birthday party this week, she overheard him proudly telling another kid, "My mom makes the best birthday cards."  Nice.  

And here is this year's set of counting cards, with this year's loot.  Yes, I put an i-Tunes card on the "1" card because he loves music but I was told that what he loved most from the cards were the 7 little photos of his friends--and then the 6 Star Wars mini coloring cards (downloaded and resized)--and then the 4 puffy bug stickers--and then the 2 sticks of fruit stripes gum--and then the 3 tattoos.  Yes, the money and the gift card ranked last which just goes to show you do not need money or anything fancy to impress with these cards.  

So I thought I would just remind you about my tutorial for these--in case you never had the wherewithal to dig all the way back in my blog archives 2+ years and so never caught this tutorial.  It is still one of my favorites--and Beeper's too, apparently.

Saturday, June 4, 2011

Where Do Doughnut Muffins Fit in the MyPlate Graphic?

Okay, maybe you should not really eat these--but you already want to, don't you?  I'm not going to stop you.  I'm also not going to tell you that these doughnuts disguised as a muffin do not taste good--because they are so yummy, so chocolate-y, and did I mention, they taste remarkably like a freshly-friend doughnut?  Oh, yeah, except they aren't fried like other naughty little doughnuts out there--these are baked, all snug and happy in a muffin pan.  
You can thank Joy for the recipe because that is where I got the recipe from.  Right here.  I have a total love-hate with her blog because I cannot resist making her stuff--like this and my goodness, I so want to make this--but really, I do not think any of these items would fit anywhere on that new MyPlate graphic from the USDA.  What do you think?
And despite all that, I'm undeterred from telling you to try these--and I am even going to suggest you double dip your muffins in the chocolate glaze (there will be more than enough from the amount the recipe makes) and just pretend that chocolate and doughnut muffins have their own special food plate graphic not yet created. In the meantime, I am dreaming about making these again, but with a nice vanilla bean glaze, then dipped in coconut.  Something to think about...