Sunday, October 24, 2010

Use What You Have: Bread Ends and Leftovers

I don't know if you are like me, but I always seem to have all sorts of bread leftovers lurking in my kitchen--heels from otherwise used-up loaves, remains from artisan loaves I bought at my co-op that I could not bear to toss out so I just tossed them in a bag in the freezer, and other freezer burnt-bread has-beens just taking up space. Okay, and I still do--but they now have a their own mission in life other than obstructing the view of whatever else is in my freezer: I make homemade bread crumbs from them.  
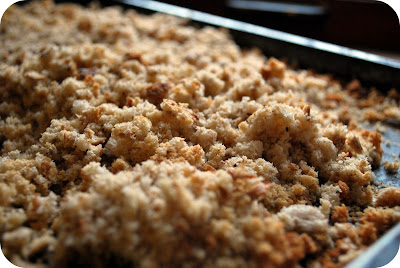
Yes, even your stale, freezer-burnt and otherwise unwanted bread pieces can be put to use.  I keep a plastic bag in my freezer at all times and simply toss these sad bread pieces in (you name it, we save it--hot dog buns, rock hard pieces of french bread, stale heels...)--and once I have a full bag, I pull them out, defrost, cut into chunks, process into crumbs, and toast in my oven.
Voila!  Bread crumbs that are perfectly delicious and useful.  I use them to make breadings for chicken, to add to meatballs, to top casseroles...whatever your heart desires.  And, if you can believe it--they will keep endlessly in a plastic bag in your freezer.  Seriously--at one point, we had a HUGE bag of bread crumbs and I think I worked from that bag for over a year...with no apparent detriment to taste (do not ask me why this is true, but it is--really.  Would I lie to you, honey?).  I sometimes even season a large quantity of the crumbs all at once so I have my fave breading at the ready when needed with no fuss or muss.  Give it a try:
And here is a little tasty dish to get you started: stuffed peppers. I love these--they are full of veggies and are like a moist and flavorful meatball all mounded up in a bell pepper. And the recipe makes lots--enough for a family dinner, or enough for dinner and then some leftover to freeze since these do freeze and reheat nicely.
And if stuffed peppers are not your thing, think about making this fantastic faux-fried chicken that is a perpetual favorite at our house. 
It really is amazing what you can make from foods you might otherwise be inclined to toss out or add to the compost heap--so check out my other how-to's on: what to do with a glut of tomatoes, what to do with over-ripe fruits, and what to do with chicken bones.  Make the most from what you have and bon appetit.

Tuesday, October 19, 2010

A Gaggle of Beasts

Made a gaggle of Beddy-Bye Beasts over the weekend.  I sort of forgot what a pleasure these are to make in multiple--all that uber-soft double-washed cashmere from recycled sweaters, the simplicity with which a beast comes together, the sweet smell of the calming herb pouch tucked inside, and all the happy colors of cashmere I have managed to thrift over the years.  They are sort of like a cuddly rainbow all grouped there together, don't you think? 

Lucky for you, they will all be for sale at the No Coast Craft O'Rama on Dec 3rd and 4th at the Midtown Global Market in Minneapolis where I will be setting up my own little shop.  And if you cannot make it over to the sale, remember that you can always make your own from my tutorial right here.

Sunday, October 17, 2010

Read This: When a Monster is Born

Keeping with Halloween inspired books, I wanted to share another monster book with you that we love--When a Monster is Born by Sean Taylor and illustrated by Nick Sharratt.   I think I bought this book for Beeper a couple of years ago when he was in the hospital having his tonsils removed and tubes put in his ears.  Of the stack of books I bought for him to keep him entertained, this was the one he most wanted to read over and over together--side by side in the hospital bed while he ate popsicles.  All that aside, let me tell you a bit about the book...
This book tells the story of a monster's life from birth through a variety of possibilities and paths a monster can choose to go, each with its own silly and beastly outcome.
 For instance, when a monster finally gets to school, it can either be an exemplary student and become the first monster to join the basketball team, or it could eat the principal.  Either option is entirely viable when you are a green hairy monster, I suppose.
And so you get to the follow the monster through his life, from birth to hiding under your bed to school and out into the world where he can choose to do things like dance the boogie-woogie or stay in a fancy hotel or fall in love with a kitchen girl and get married...
...and all the while you learn about what happens when the monster chooses one course over another, eventually all coming full circle in the end.  It is a clever book, with colorful and happy illustrations  (even when the monster is eating the principal) that pop from the black backgrounds.   Full of unexpected possibilities and outcomes, there are few things that happen in a monster's life that are entirely predictable (other than showing up under your bed, of course), which is part of the charm of this monster book that is more funny than frightening.  

Saturday, October 9, 2010

Look Ma! I'm in Woman's Day!

Earlier this summer I was asked by Woman's Day to design a little something for a special holiday issue and I am so excited to now see it in their Best Ideas for Christmas issue (on news stands now!). This was particularly cool for me because when I was kid, my mum always bought Woman's Day and I grew up looking at this magazine, perusing the craft pages even back then, and sometimes even making something with my mum from the magazine.  So, it is all full-circle-feeling to be in the magazine today.
And the issue is a good one--chock full of lots of crafty ideas for gift wrapping, a retrospective of the best cookie recipes from the past 9 decades (who knew they have been around 73 years now?), and loads of other holiday decorating ideas.
And this is what I contributed--a  set of variously sized pine trees made from recycled Pendleton plaid wool shirts and felted sweaters--each one tagged with a piece of twill tape stamped with numbers 1-24 to represent the days of advent.  What I love about this project is that it is entirely hand sewn (my favorite kind of sewing), and it is really quite pretty to look at when you line all the trees up on a mantel or sideboard or something like that--having both form and function.
And because the trees are all hollow, they are perfect for stashing a sweet note from a family member, a lovely nature find, a truffle, a funny little limerick, or even one of Emily's Lucky Teeth.  

So, go check it out at your neighborhood book/grocery store, or you can also see a posting about the article I was in on Woman's Day's website.  It has photos of my project and other simple holiday projects designed by a handful of other bloggers (like Maya's own fantastic advent calendar made unbelievably from TP rolls), plus downloadable instructions--find all the goodness right here.

Wednesday, October 6, 2010

Over at Whip Up Today

It seems like I am here, but actually I am over at Whip Up today--I'm clever like that.  You see, Kathreen so kindly invited me to be one of her guest bloggers while she is away from the office (I know, can you believe she trusted me with her wonderful blog while she is away?).  So, in order to keep every one properly entertained over at Whip Up, I have put together a little tutorial on how to make this colorful tote designed just for your library book needs.
Besides being extra big  and sturdy in order to accommodate large library book hauls, it also has this handy library card pocket so you never need to search for your library card again when all you want to do is get out the door and over to the library--because it is all right here!  Super practical for the scattered-brained and perpetually distracted amongst us.
So head on over to Whip Up for complete step by step instructions and a downloadable tutorial in the usual Chez Beeper Bebe illustrated pdf format. 
Oh yeah, and here is one more shot of Beeper with the tote because really, he was the inspiration behind the tote.  You can read more about that too over at Whip Up.  So what are you waiting for?  Come on over to Whip Up and let's party--I mean, get together over there.  Find me here.  I'll be waiting.

Sunday, October 3, 2010

Made Over the Weekend

 This is what was made this weekend with Beeper--monster tee of his own design made with Crayola fabric crayons, and some of Sarah's Small Object Paper Dolls that were offered on Kiddley way back when Kiddley still existed.  I could have done a million of the paper dolls, personally, but Beeper had limited time for this exercise--he was more keen to keep on coloring the Harry Potter coloring pages I printed for him in the morning as a way to keep him occupied while Mr Beeper and I enjoyed coffee and muffins.  And about the fabric crayons I would say this--the colors they produce are quite dull, the image itself looks a little blurred from the original, and I really have no idea how well the image will hold up in the wash since the back of the box said to use all synthetic fibers (ick) for the best result --but for simplicity of the process (Beeper colored the picture, I spent 5 minutes ironing it on), I would give it high marks.  And he was eager to wear it to school tomorrow so there is that.  Just remember that whatever you draw will be backward once transferred--we made one colorful design that said I am awesome and I ironed it on another shirt for Beeper and then realized all the letters and words were backwards--so we just called it his secret message shirt because it can only read when you look in the mirror.